...
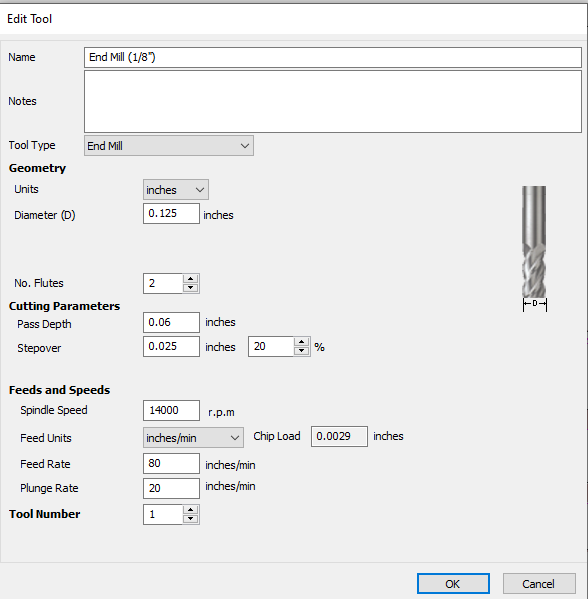
Tool Number = Applicable to the EBF only. It is up to you to choose the tool numbers that correspond with which tools you plan to put in each tool holder slot. VCarve will usually show an error if you try to use two tools with different profiles with the same tool number.
Example Settings for 1/8 End Mill
Example Settings for 1/4 End Mill
Examples:
- Members have added lots of tools to the Tool Database and those tools may not have the same settings applied that you want to use. If you're editing your file on the shared machine, pick a tool you want to use, make sure to check all settings and don't assume that the tools has been setup the way you want to use it.
- For example, on the Purcellville computer's copy of VCarve, one of the "End Mill (1/8")" tools is setup to do a Pass Depth of 1" per pass, pretty much guaranteed to break the endmill the first time it tries to cut 1" deep through material like wood or plastic in one pass. However this tool may have been setup to cut foam where cutting 1" deep per pass is exactly what you want it to do.
- Check the feeds, speeds, plunge rate and tool number are correct. Again, on a shared machine, someone else may have set these attributes to cut a very different material than you are cutting.
...
- The "Clearance (Z1)" setting in the "Rapid Z Gaps above Material" setting determines how high the endmill moves above your workpiece between cuts. This needs to be high enough to clear any clamps, screws, or fixturing materials that stick up above the top of your workpiece. If you are using Big Red and you have clamps that stick up above your workpiece by 2", you want to make the "Clearance (Z1)" value over 2".
- The settings int he in the "Home / Start Position" section govern where the machine will move to before it starts cutting your project. In the example above, the machine will move to its X0 Y0 position first, then move to the first cut. Just like the "Clearance (Z1)" field above, the "Z Gap above Material" settings should be high enough to clear any clamps, screws, or fixturing materials that stick up above the top of your workpiece.

