Introduction
The Pro World Press is designed to heat and press heat treat vinyl (HTV) onto a flat cloth surface. This can be t-shirts, baby bibs, baby onesies, dog scarfs, anything that can be laid flat on the surface of the heat press. This machine is NOT a red tool, but it can still cause burns if used incorrectly.
The top of the heat press is the part that heats up, so that's the part you should be careful of touching. The bottom remains cool, except immediately after the press is released.
Parts of the Press
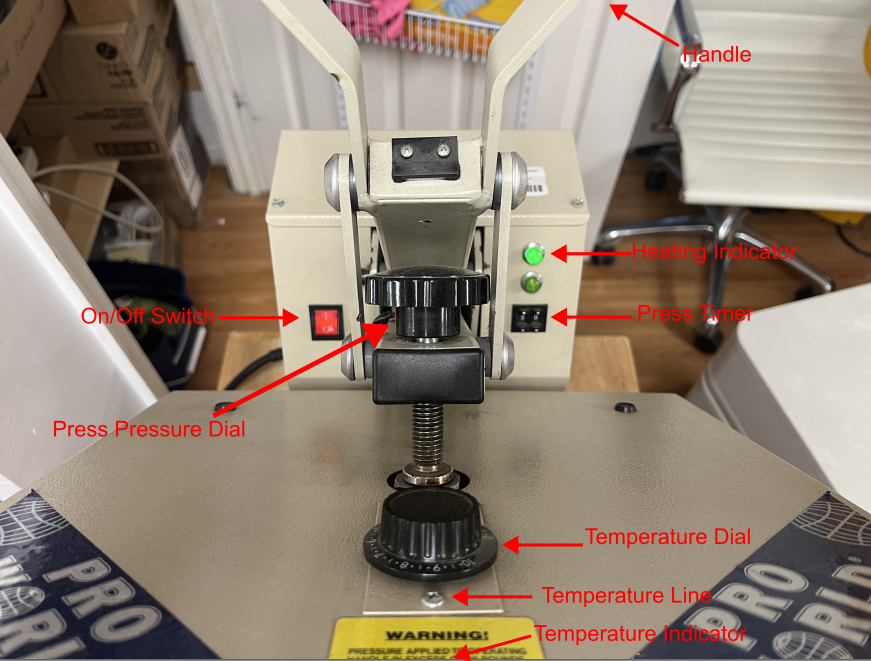
Handle - The handle that you pull down to engage the press
Heating Indicator - When the machine is heating up, but has not come up to temperature (based on the Temperature Dial setting) this light will stay illuminated.
Press Timer - This has a button above and below each number. The number shows the timer length once you press down with the handle.
Temperature Dial - This dial determines the temperature of the press. Whichever number is facing the silver screw (indicated above as Temperature Line) is the machine setting.
Temperature Indicator - Not in the picture, but is a thermometer on the front of the machine that indicates the current temperature. The temperature is measured in the middle of the machine and is within +-5 degrees of using a temperature reader gun.
Press Pressure Dial - You can adjust the pressure of the machine. The setting in the photo is maximum pressure. Turning the handle from the position shown will lower the pressure of the press. \
On/Off Switch - Switch for turning the whole machine on and off.
Temperatures
This heat press is designed to get up to temperature and then hold it, even through repeated presses. If you set the press too high and want to reduce the temperature, you need to turn off the press and wait. Use the manufacturer's recommended temperature. Example - Siser Easyweed HTV has a recommended temperature setting of 305 so set the temperature dial to 8.
7 = 250 degrees
7.5 = 275 degrees
8 = 300 degrees
8.5 = 325
9 = 350
Cutting Vinyl for a Heat Treat Object
- Heat treat vinyl can be cut on a Cricut or other vinyl cutter.
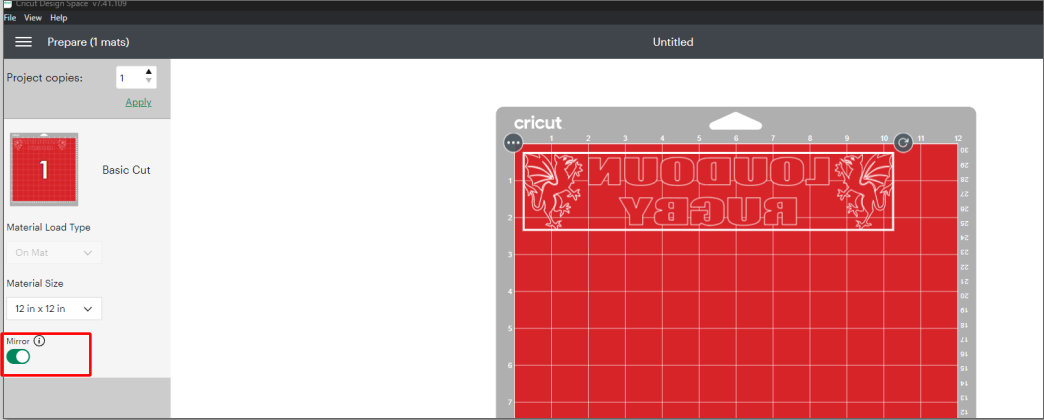
- When using a Cricut, you will use the "Iron-On" setting on the machine which cuts through the vinyl, but leaves the clear plastic carrier intact.
- When you set a Cricut to Iron-On, it will remind you that you need to mirror your image/text before cutting. Make sure you do this your image will be wrong when you press it onto your object.
- For most HTV, you cut with the shiny side down against the cutting mat. Check your vinyl's instruction sheet ahead of time, but this is usually right.
- Once you have cut your HTV, peel away the vinyl that isn't part of your image. You're left with a clear plastic carrier sheet with your reversed image on it,
Pressing a T-Shirt
This example was done using a 100% cotton, Gildan t-shirt purchased from Michael's and Siser Easyweed HTV cut on a Cricut Air 2, using Cricut Design Studio
- Wash and dry your T-shirt ahead of time. Most of the HTV manufacturer's suggest doing this.
- Turn on the machine using the On/Off Switch
- Adjust the temperature to the HTV manufacturer's recommendations. Siser Easyweed HTV suggests 305 degrees so the dial was set to 8.
- Adjust the Press Timer to match your manufacturer's recommendations. Siser Easyweed HTV suggests 10-15 seconds. I set the Press Timer to 15.
- Adjust the Press Pressure Dial to the manufacturer's recommendations. Siser Easyweed HTV suggests a medium pressure. I left it on the highest pressure setting. (The only reason I can see to change this is if you have an object that isn't perfectly flat across the bed such as a baby onesie where the seams are all on the bed, meaning that the cloth isn't completely flat.)
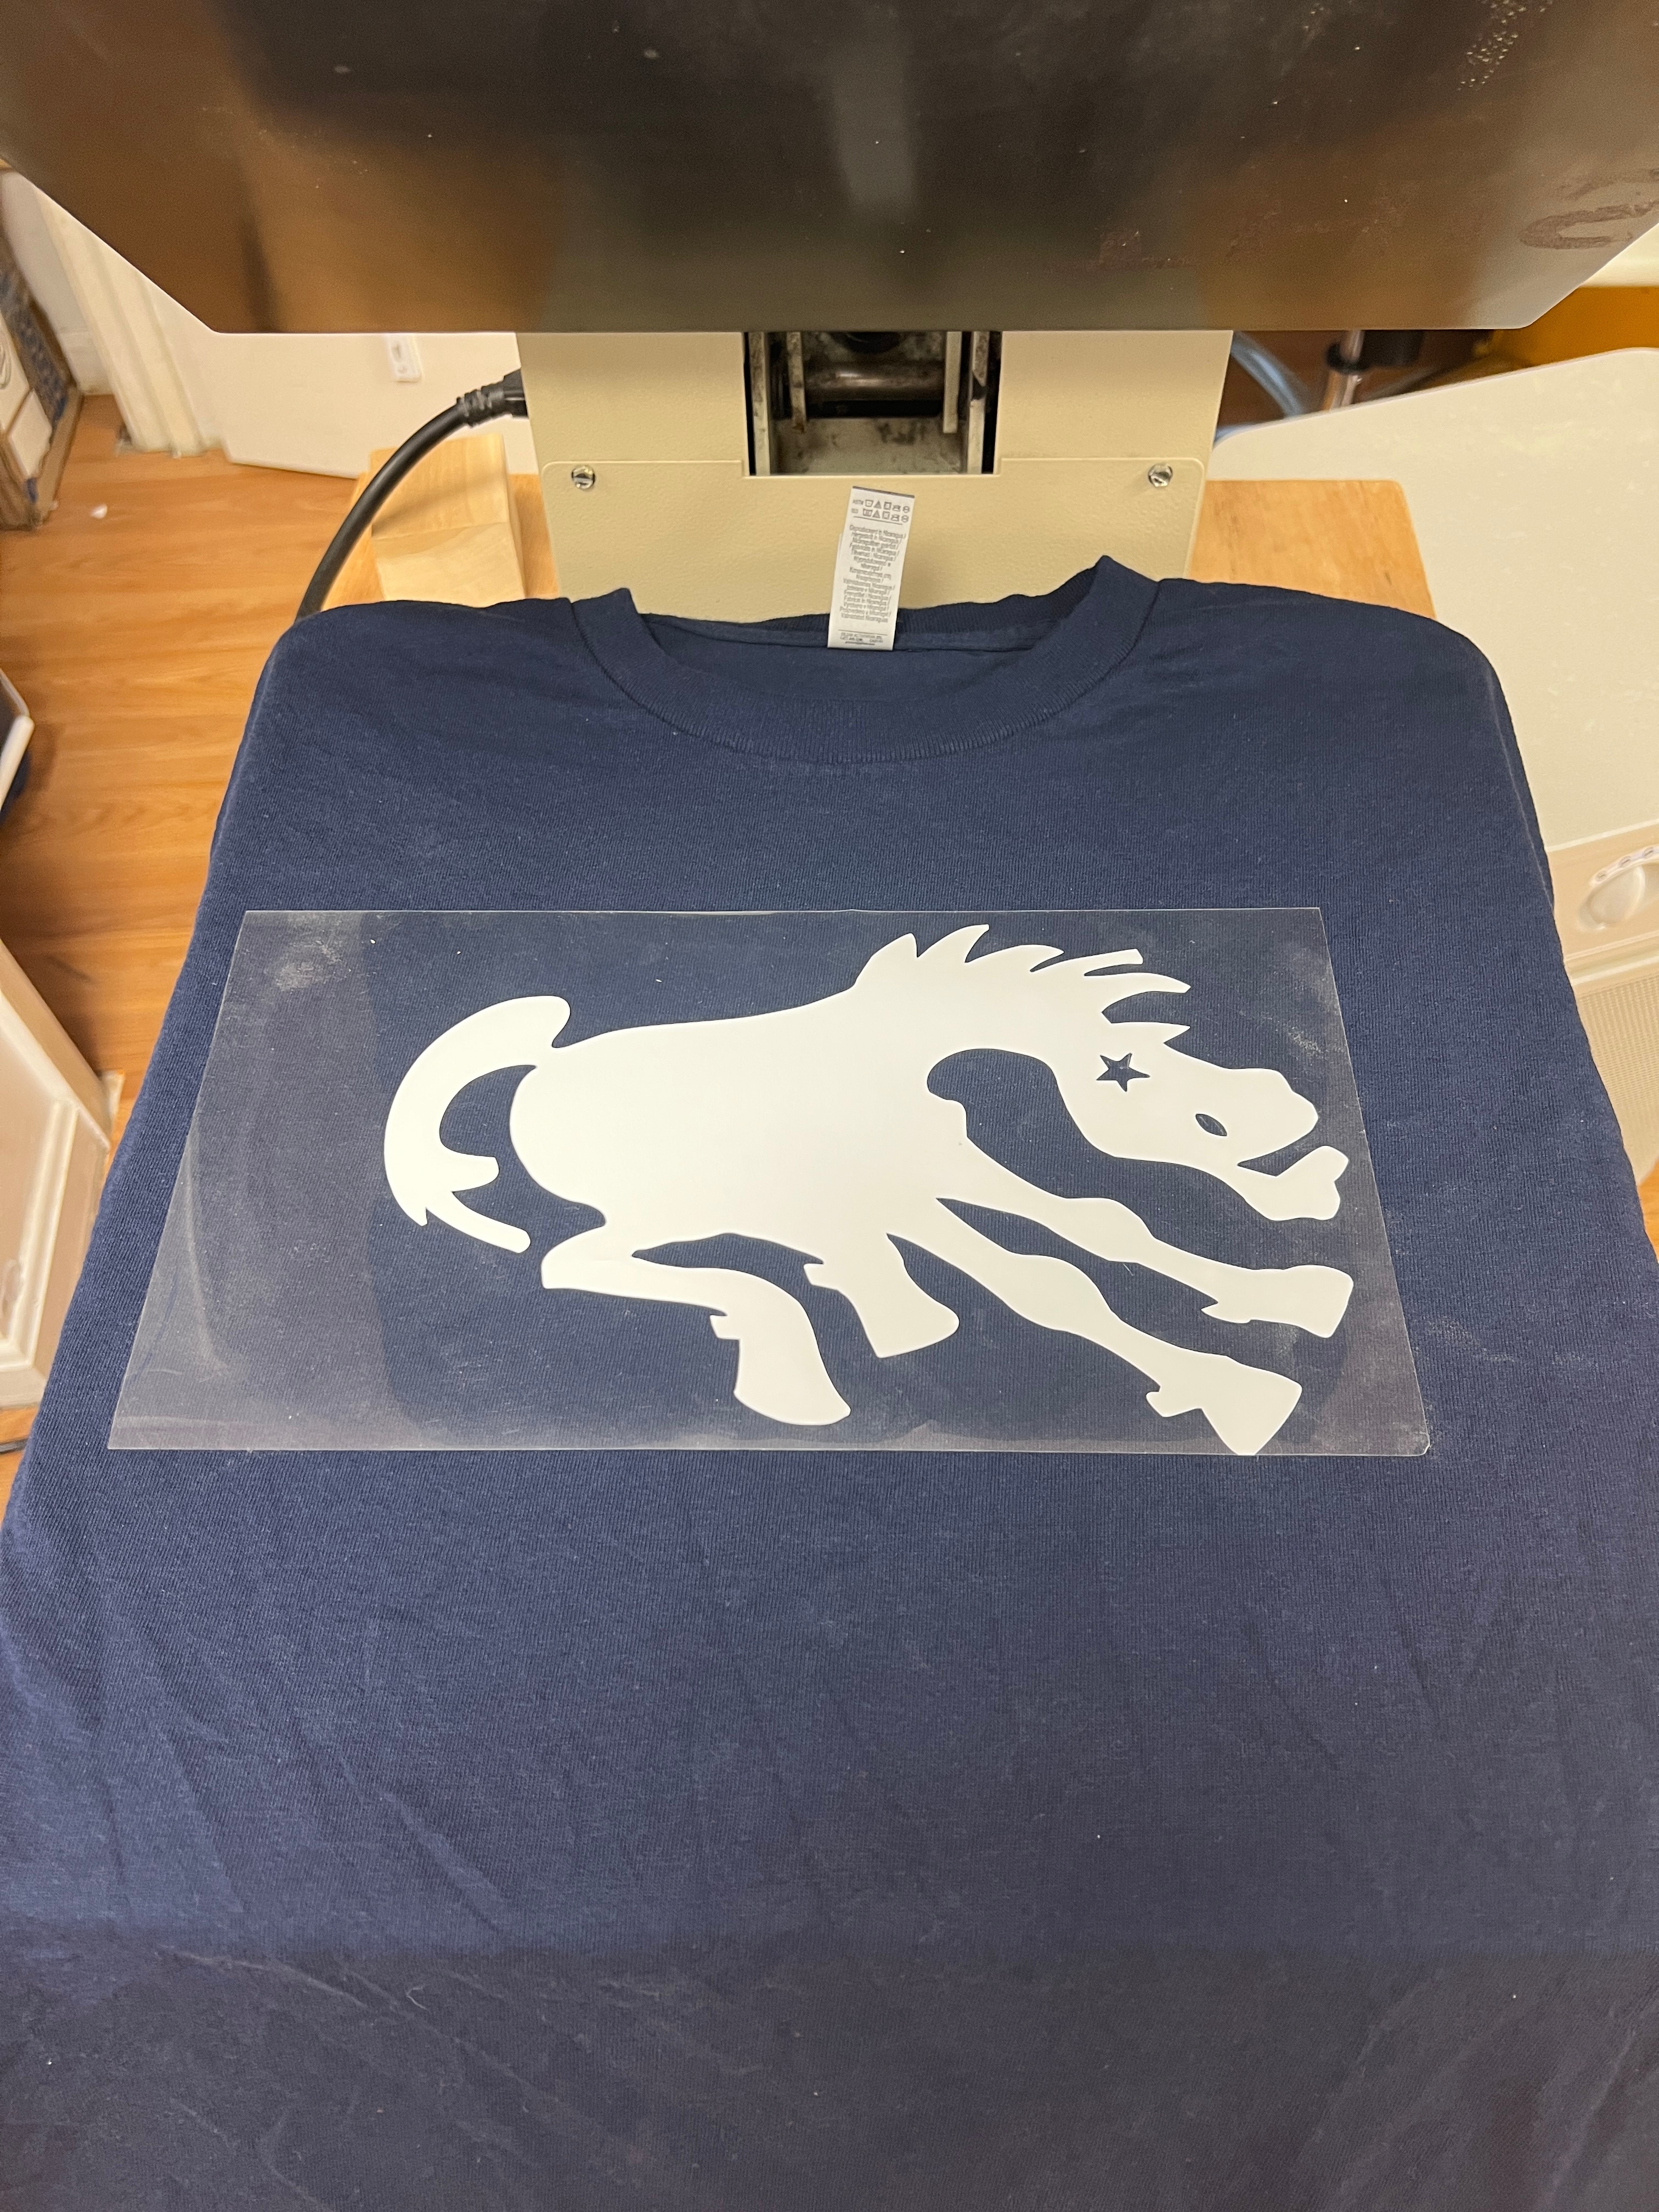
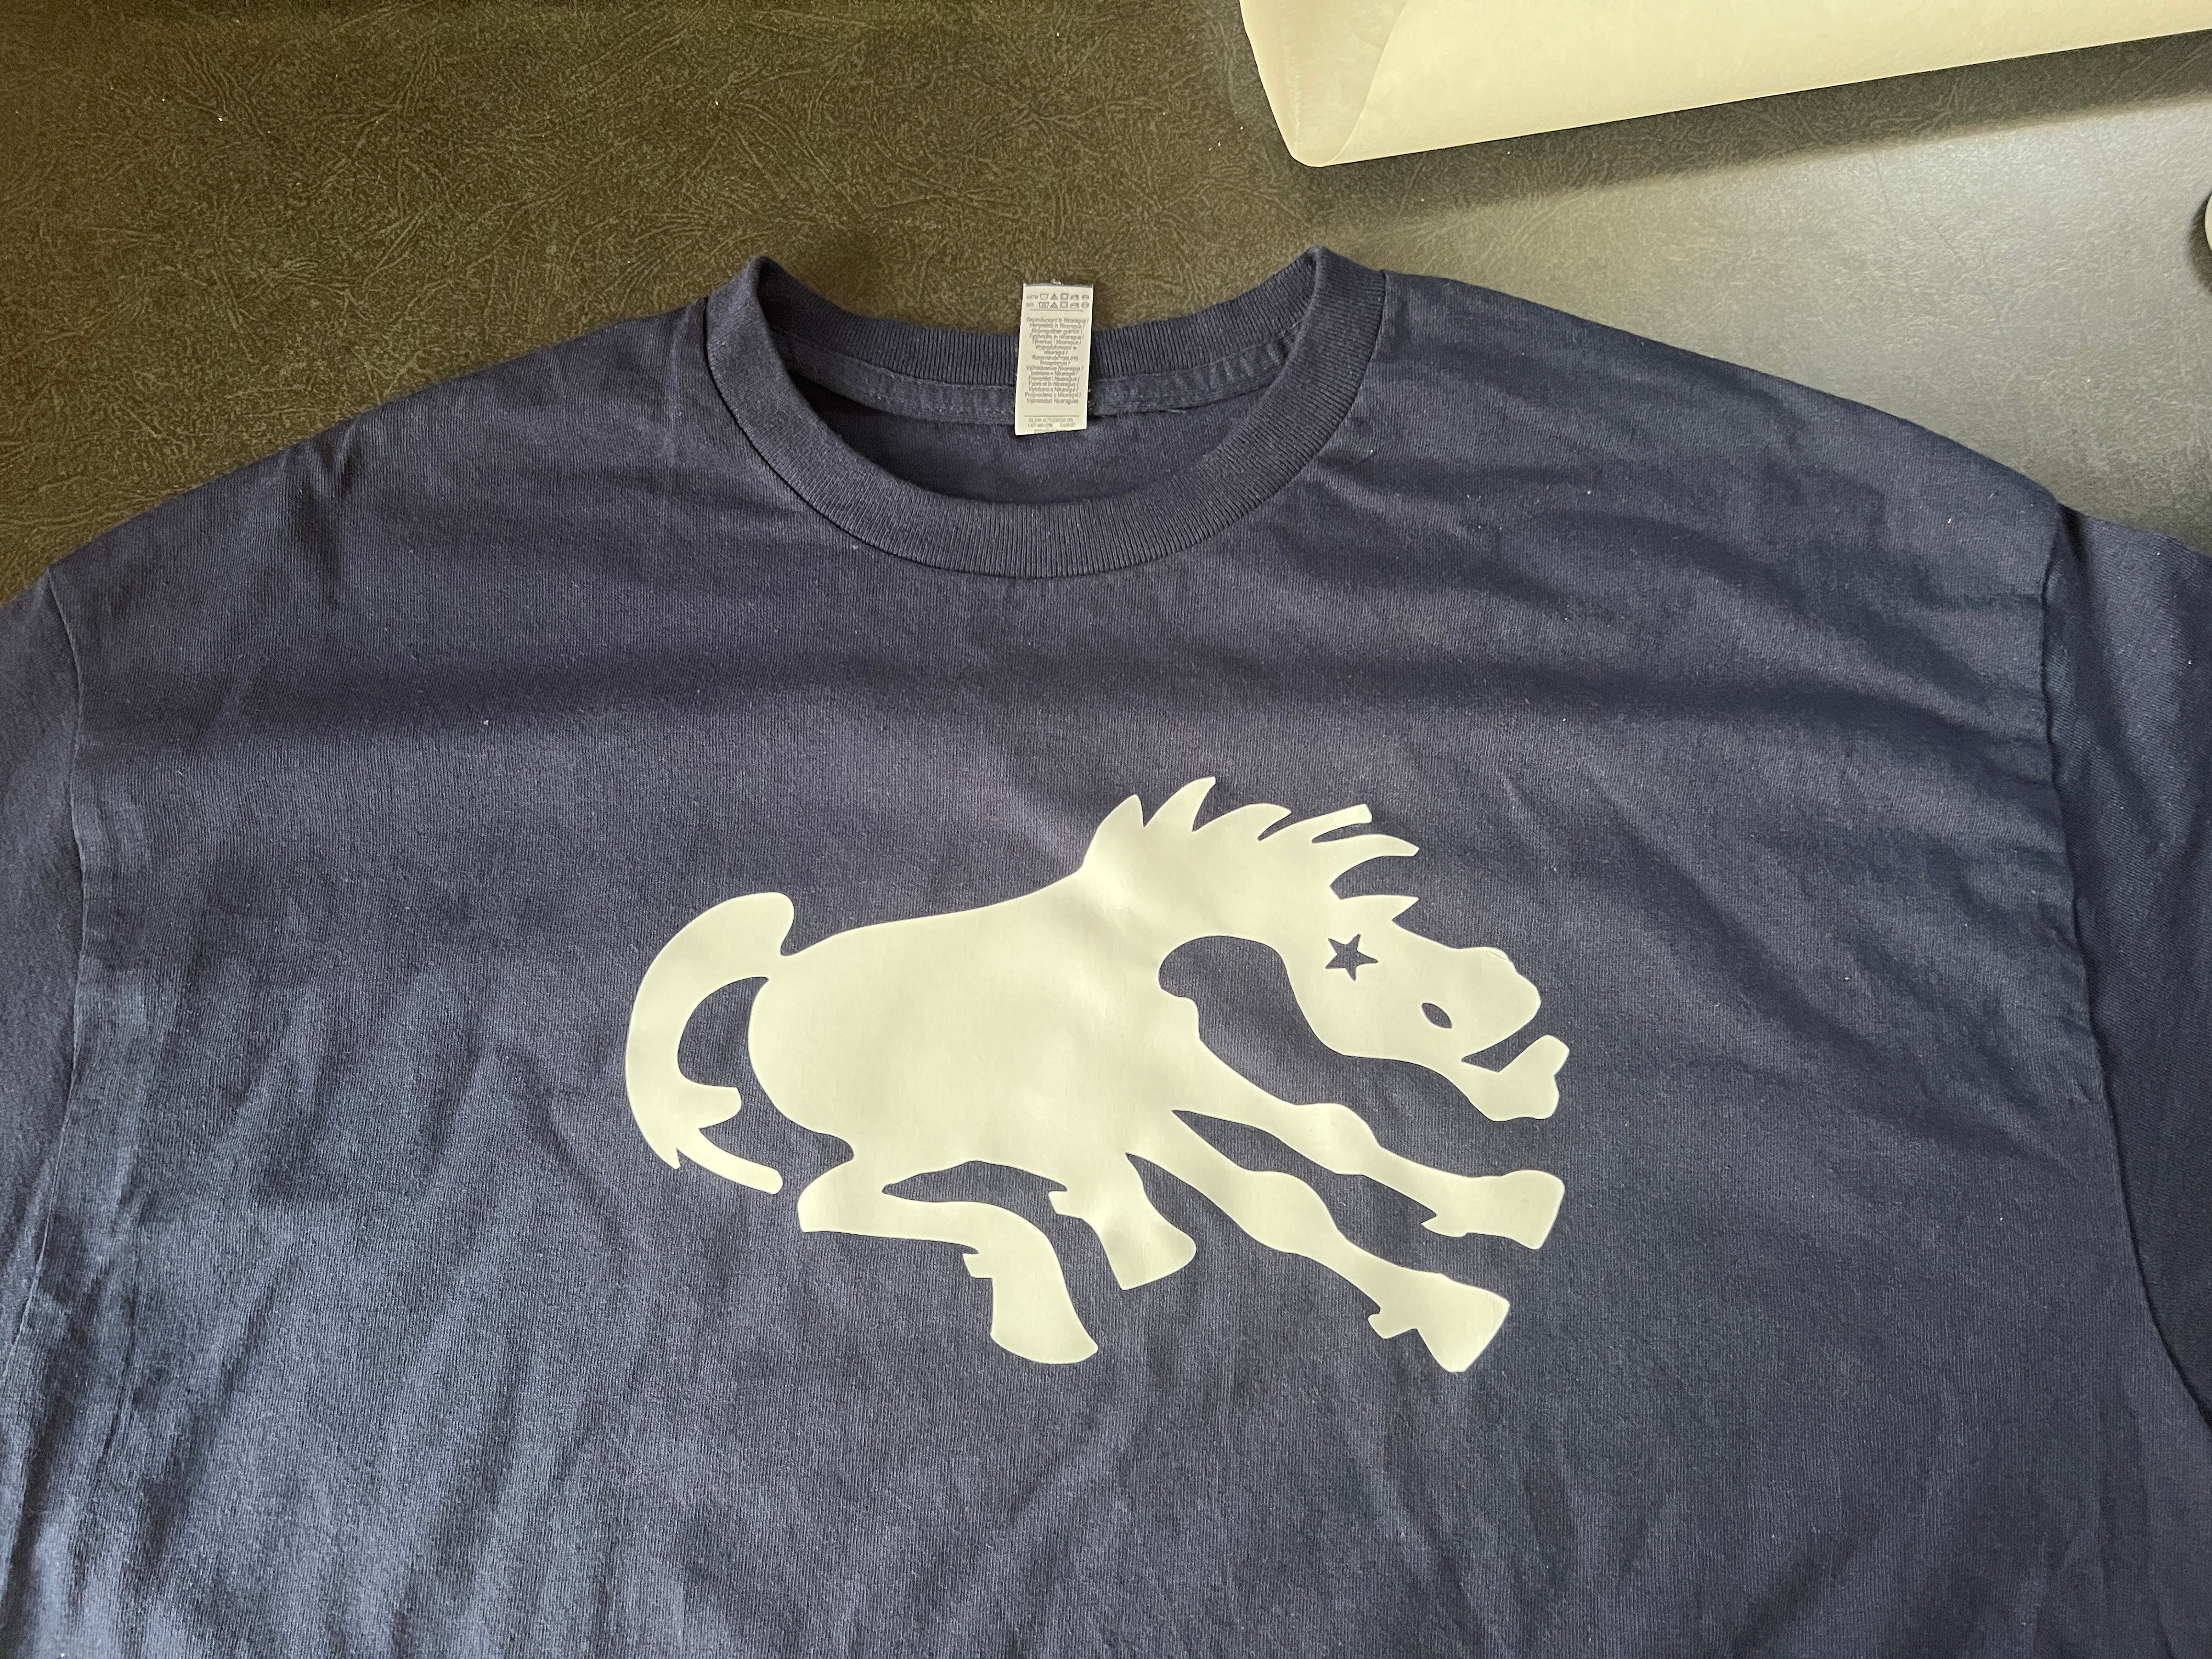
- Put your shirt on the press and align the center of the collar to the center of the bed. You can see the tag on the screenshot below:

- Most HTV suggests warming your item before pressing, so lower the press using the handle, count to 3, then raise the press.
- Find the center of your image. I do this by folding my HTV, taking care not to crease the actual image, but creasing the carrier plastic in the middle of the image.
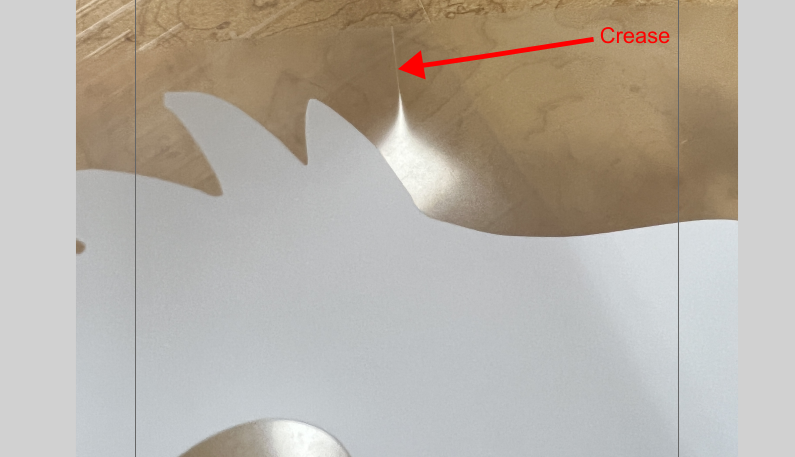
- Then line up the crease in the middle of your image with the center of the shirt collar. Set the image as high or as low on the shirt as you want to put it. Bear in mind this will change depending on the size of the shirt.
- Press the machine handle down until you feel it lock into place. You don't need to apply a lot of pressure to lock the machine. If you do, raise the handle and turn the Press Pressure Dial counterclockwise to reduce the machine pressure. The machine will then heat your vinyl for the time you set the Press Timer to. The machine will buzz when the time has elapsed. Lift the handle.
- The HTV and shirt will be hot at this point so be careful. Remove the shirt from the press.
- Some HTV says that you hot or cold peel the carrier. I have never had good luck trying to peel the carrier while it is still hot. I always set the shirt to the side and wait till it cools, usually within a minute.
- If while peeling the carrier off, you find that the vinyl hasn't completely stuck to your shirt, you can re-press the shirt again. There is a lot of variability between shirt types, materials, thicknesses, HTV types etc. so there is no single right way to do this, but I tend to press it again for the same amount of time and at the same temperature as the first press.
- Once the shirt has cooled and you've removed the carrier, Siser Easyweed says not to wash the shirt for 24 hours after pressing. Other manufacturer's may have different recommendations.
- You can immediately set another shirt on the press, align your vinyl and press again.
- When you are done, turn off the press, and put the "HOT" sign on the bed of the press.
Troubleshooting
Heat pressing a shirt is usually a one off process. If you press the HTV too long or too hot, or you put your image in the wrong, place, you will likely need to get a new shirt.
- If you press your shirt and your vinyl no longer looks smooth, its probably because you had the heat up too high or pressed the shirt too long. Make sure you are heating to the manufacturer's recommended temperature and pressing for the recommended amount of time.
- If you press your shirt, let it cool and the vinyl isn't sticking:
- Did you wash and dry the shirt ahead of time?
- Did you pre-heat the shirt by pressing down on the press for 2-3 seconds before applying your vinyl?
- Did you have the heat and press time settings correct?
- Re-press the shirt again with the correct heat/time settings and try again.