| | | |
|---|
| | Open Mach 4. There is a icon on the desktop | |
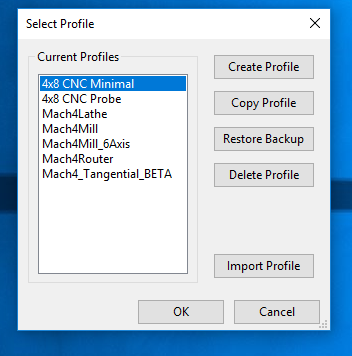
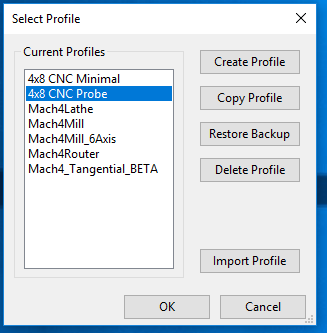
| | Select the Machine Profile you want to work with:- The 4X8 CNC minimal profile is a great basic profile, but does not include probing (Start Here)
- The 4x8 CNC Probe profile includes additional screen elements for positional probing (Advanced Class)
|   |
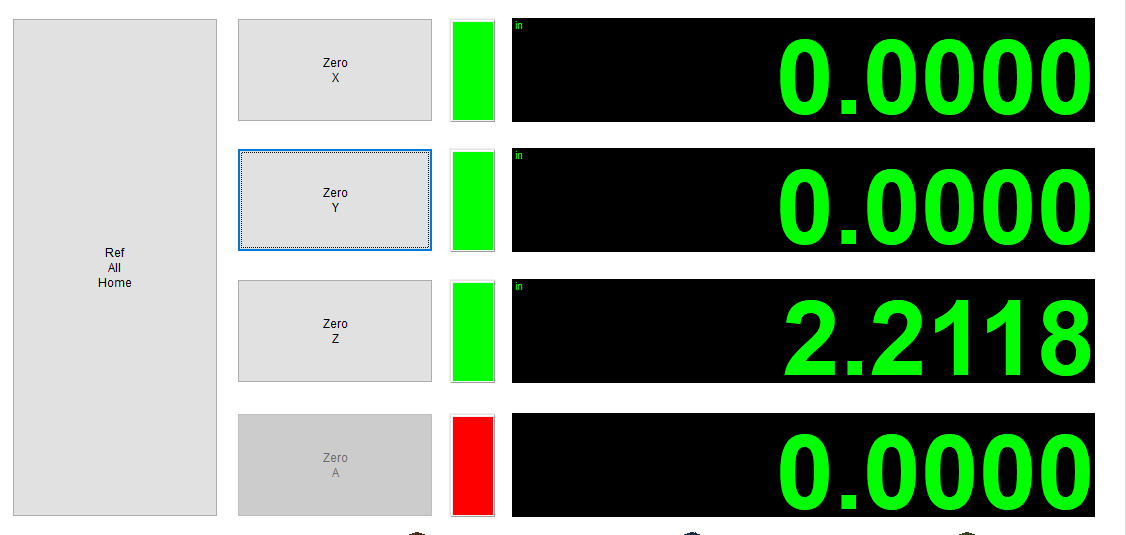
| | Once Mach4 loads the first thing we want to do is to reference the machine. - Before referencing the machine it is a good idea to jog each axis to make sure things are moving in the direction expected. See jogging below and jog each axis and confirm it is moving in the expected direction.
- Make sure the Z axis has been raised so that it clears everything on the table. This can be done by jogging outline below
- Make sure there is nothing on the machine rails that would interfere with moving the machine. DO NOT PUT STUFF ON RAILS
- If you want to reference all at the same time you can use the "Reference All Axes" button. This will move the machine to the front left hand corner of the machine.
- Once referenced the LED's next to each axis will turn green.
The reason you must always reference the machine is that if something happens during your job you can re-reference the machine and then move it back to a known position within your job. If you don't reference the machine and something happens you will have a difficult time getting the machine back to the correct location. |  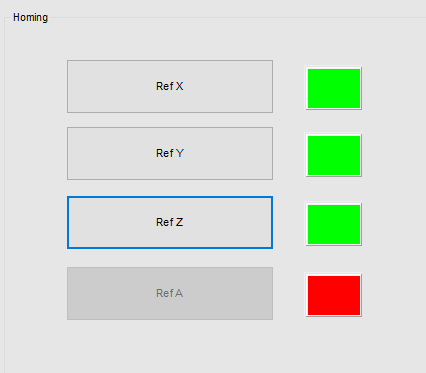 |
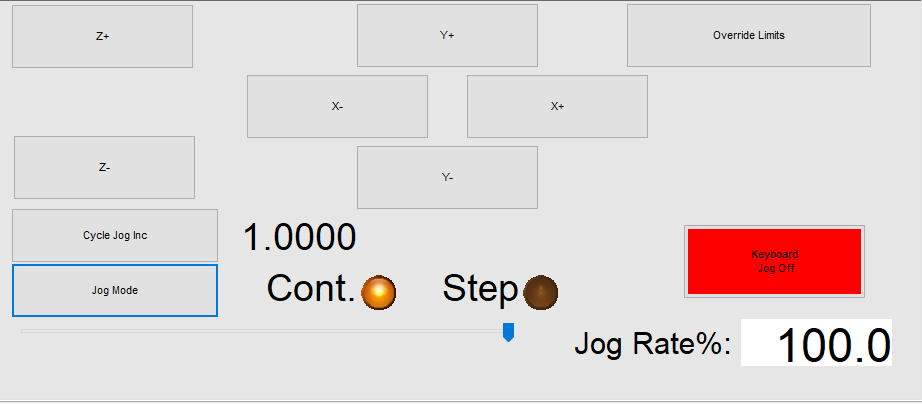
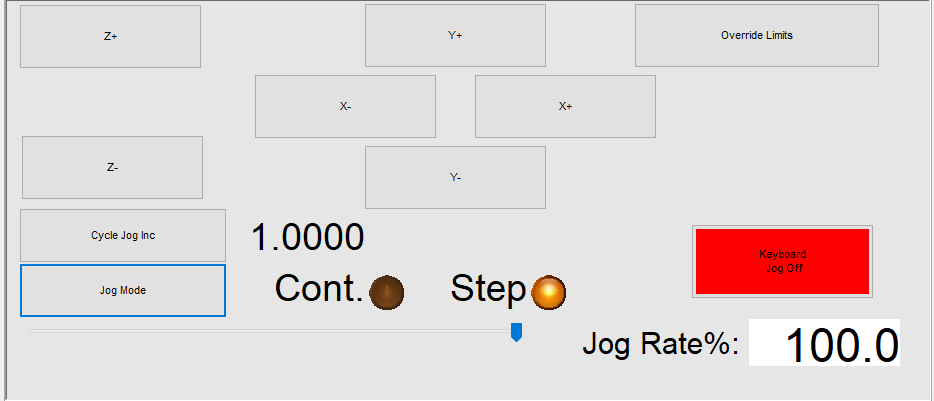
| | Jogging the machine. There are two different jogging modes Continuous and Incremental (Step) Machine Layout - Y Axis is the long axis from the front to the back of the machine
- Y+ will move the gantry backward
- Y- will move the gantry forward
- X Axis the the side to side axis
- X+ will move the spindle right
- X- will move the spindle left
- Z Axis is the up and down axis
- Z+ will move the spindle up
- Z- will move the spindle down
Switching Modes - Select Jog Mode Button will toggle the machine between step, continuous and disabled
Jogging in Continuous mode - Select Jog Mode and make sure the machine is in Continuous mode Cont light is lit
- Use the control buttons (Y-,Y+,X-,X+,Z-,Z+) to move the machine
- In this mode the machine will move rapidly in the direction you have selected, but you have limited control over how far the it moves with each press of the button. This mode is good for large moves
Jogging in step mode - Select Jog Mode to place machine into incremental mode
- Use the Cycle Jog Inc button to select how far each button press will move the machine in inches
- 1.0000
- 0.1000
- 0.0100
- 0.0010
- 0.0001
| 
 |
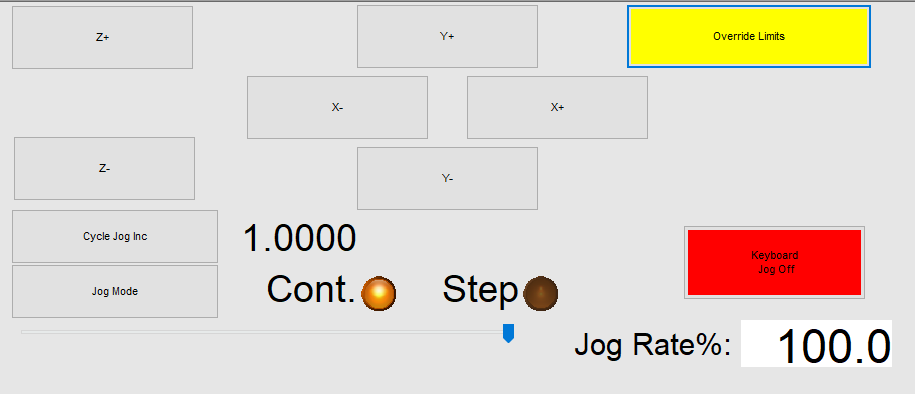
| | If you have Jogged the machine to far and you hit an endstop that machine will be disabled and you cannot jog that machine without overriding the machine by selecting the Override limits button. - When selected the machine will move past the limit, but be aware that if you use this you need to re-ref the machine since the machine will count steps that are up against a stop as steps.
- Never run the machine with override limits enabled. This is for emergency's only
|  |
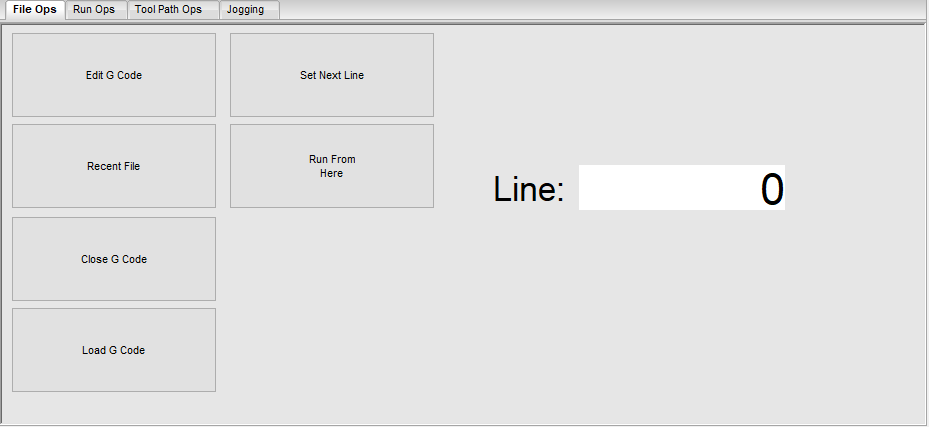
| | Loading GCode - Select File Ops Tab
- Select Load G Code
- Select your G code file
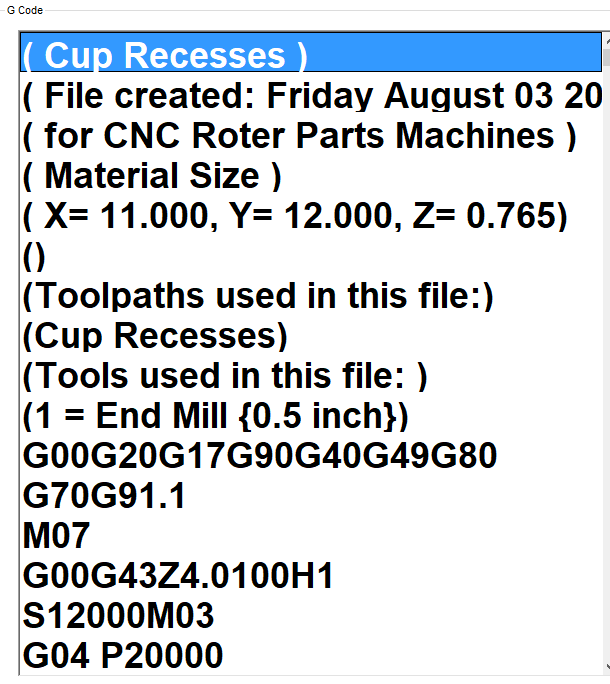
This will load your GCode file and populate the GCode screen - Verify your GCode settings
- Material Size
- Tools Used
- Spindle Speed (SXXXXXXM03) GCode line
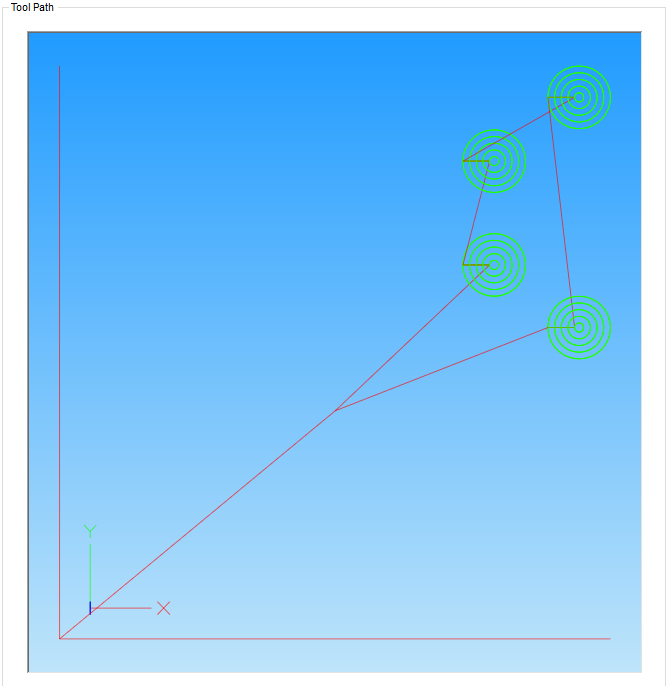
Check your tool paths in the tool path window to make sure they look correct - Is what is shown what you are expecting?
- Does the position look correct?
| 
  |
| | Using the touch probe to set the Z axis This is a very important step since without this you will damage the machine or cut into the spoil board. Doing so is expensive - Locate the z probe plate and place on the corner of your material
- Attach the Probe clip to the endmill or the X axis spring plate as shown in class. This is critical
- Touch the touch plate to the endmill and ensure the light turns green
- Jog the machine so that the end mill is located over the center of the touch plate
- Move the Z- till it is approx 1/4 in above touchplate
- Select the touch button
- Select the Find Z Button in the lower right hand corner
- This will move the z- until it touches the touch plate. When this happens it will retract. If it does not retract and does not set the Z value perform the steps below
- Once the Z has been set remove the plate and the clip and return them to the desk
Resetting on a failed touch - Enable the machine if disabled
- Jog the Z upwards
- Close the touch interface
- Reopen the touch interface and perform steps outlined above.
| 
|
| | Setting the X and Y Home Currently the probe plate is not setup for X and Y Home, so this is done manually. Once we update the plate I will update the instructions for using it - jog the machine to the corner of your material
- You want the corner of your material to be in the center of the end mill. Using step jogging jog the machine
- Once you are happy with the location select Zero X and Zero Y buttons
This will set the material X and Y and the machine references all operation off of this location | 
|
| | Now that you have setup the machine and performed the following - Referenced machine
- Set Z zero
- Set X zero
- Set Y zero
- Loaded G Code
you are ready to run your job This is done by selecting the cycle start button. Once this is selected the job will start. You have to have the estop in your hand at all times when running the machine. | 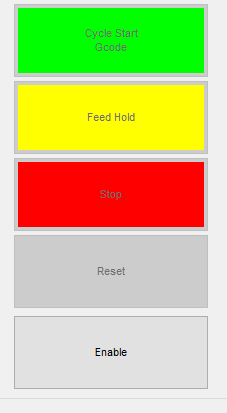 |
| | | |
https://www.woodcraft.com/blog_entries/spiral-router-bits-vs-straight-router-bits