FIRST THING - When choosing a paper type make sure that the paper shows Photo Black!!!! If it says Matte Black, change to a different paper.
There are reasons for this, but the major one is that there is MUCH more photo ink than Matte ink and also because when you change between blacks, it wastes 23ml of ink.
Printing Station
The Computer in the 3D printing lab is setup to print to the printer right now. Drivers are loaded and ready to go. The current IP Address of the printer is 10.1.1.62, but it is currently setup for DHCP and may change. I'll work on getting that statically assigned and a common DNS name for it.
Driver
The driver can be downloaded from the Epson site at:
Select your operating system and download and install the driver.
Loading the paper
This is a bit tricky and it may take a few times to get it right. The Quick Reference Guide has a great walkthrough for this. The document is attached below and in the documentation page with the other documentation.
Quick and dirty.
The paper is held in on the left side. Slide the lever down to the UNLOCK position. It does take a bit to click it down to unlock, so if it doesn't move, then push down a little more. Once it is unlocked, slide the holder to the left to release the roll. pull the roll out to the indentation on the top of the printer. the roll paper media adapters remove by flipping up the gray lever and pulling it off. Repeat on the other side. Put the media adapters on your new roll and make sure the paper is feeding off the top of the roll and into the printer. Slide the paper to the far right and then slide the roll paper holder to the right and flip up the lever to lock it in place.
Click the Paper load button in the upper right corner.
Printing
When you go to print, you will be presented with a dialog box like this:
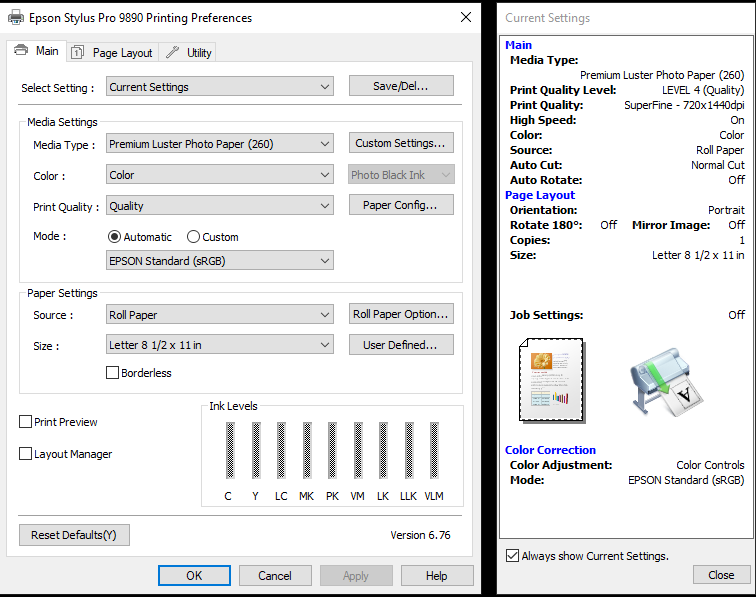
The most important area of this is the Color line. You will see in this example that the Black Ink being used is the PHOTO black ink. If you change your paper type to plain paper or similar, you will see that it changes to Matte Black ink. The paper setting is not quite as important for most prints. When you get to actually using high grade papers, specialty canvas papers, or premium photo papers, it will be more important, but then you will also be using photo black most likely anyway.
The other important section is the paper settings. The source should match the source of the paper that you are using. The size and the orientation of the paper is just as you would for any printer.
Once you get a setting that you like to use, you can save it at the top with the save/del button.