This is the guide for printing to 3D printers attached to the Repetier Print Server.
Step-by-step guide
This guide assumes that you have your gCode file from Cura, Slic3r, or Simplify3D ready to go.
- Browse to the server at http://10.1.1.21
- You will get a login screen. Use the username and password on the wall in the 3D Printing room.
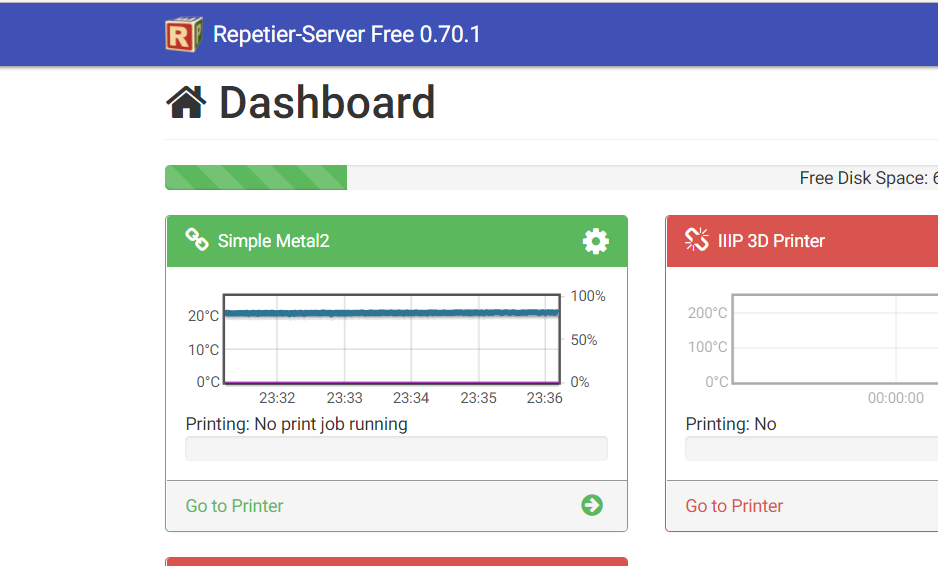
- Now on the main page you will see a few printers. The ones that are green are ready to be used. (See 1st picture below)
- Let's try the PrintrBot Simple Metal
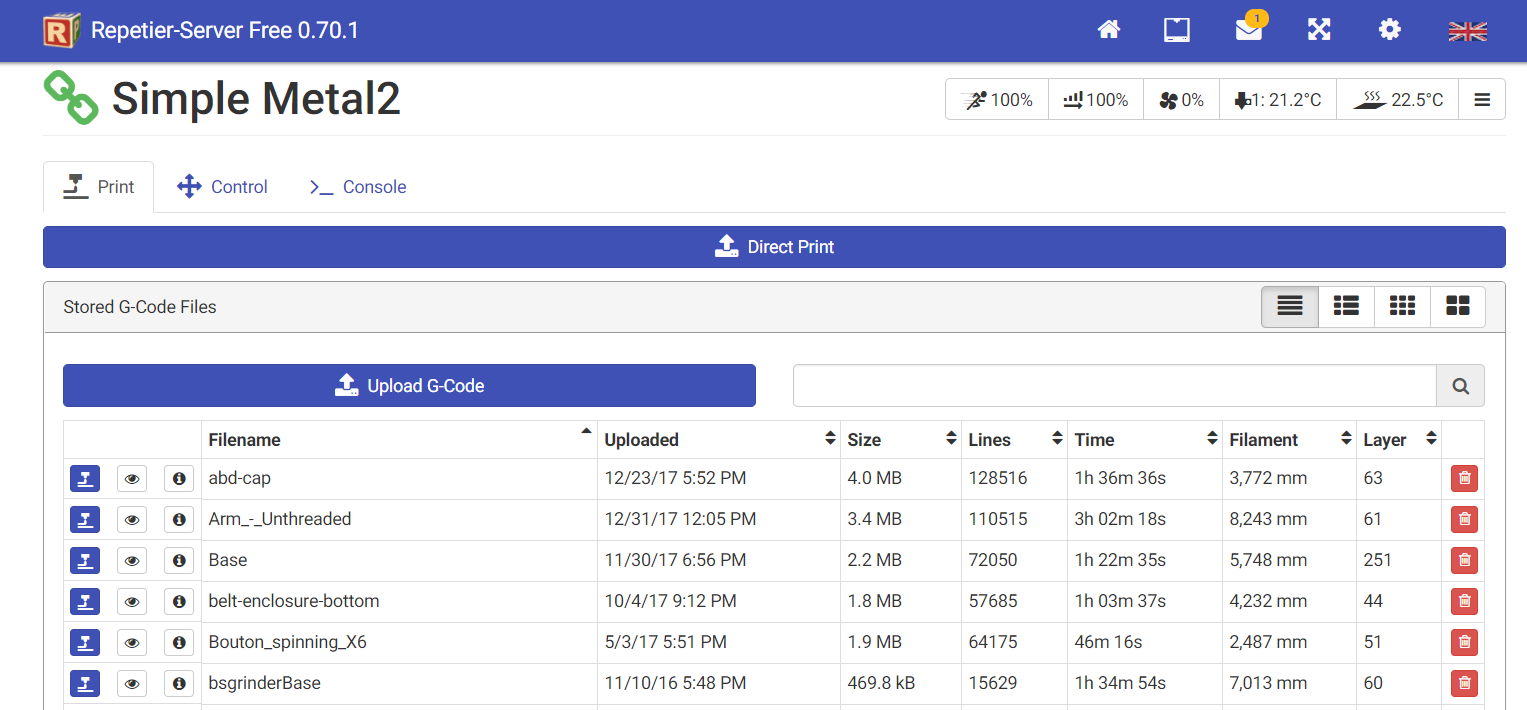
- Click on the Go to Printer under the printer display.
- Now you'll see a page with the status at the top and a list of files in the print queue below. (See 2nd picture below)
- You will also see an Upload G Code button.
- Click on that and select your file from your computer.
- Once the file is uploaded you may not see it.
- You can click on the Uploaded column to sort by Date. One or two clicks will bring the newest file to the top.
- Now you can print. Click the
 next to your file name to start printing.
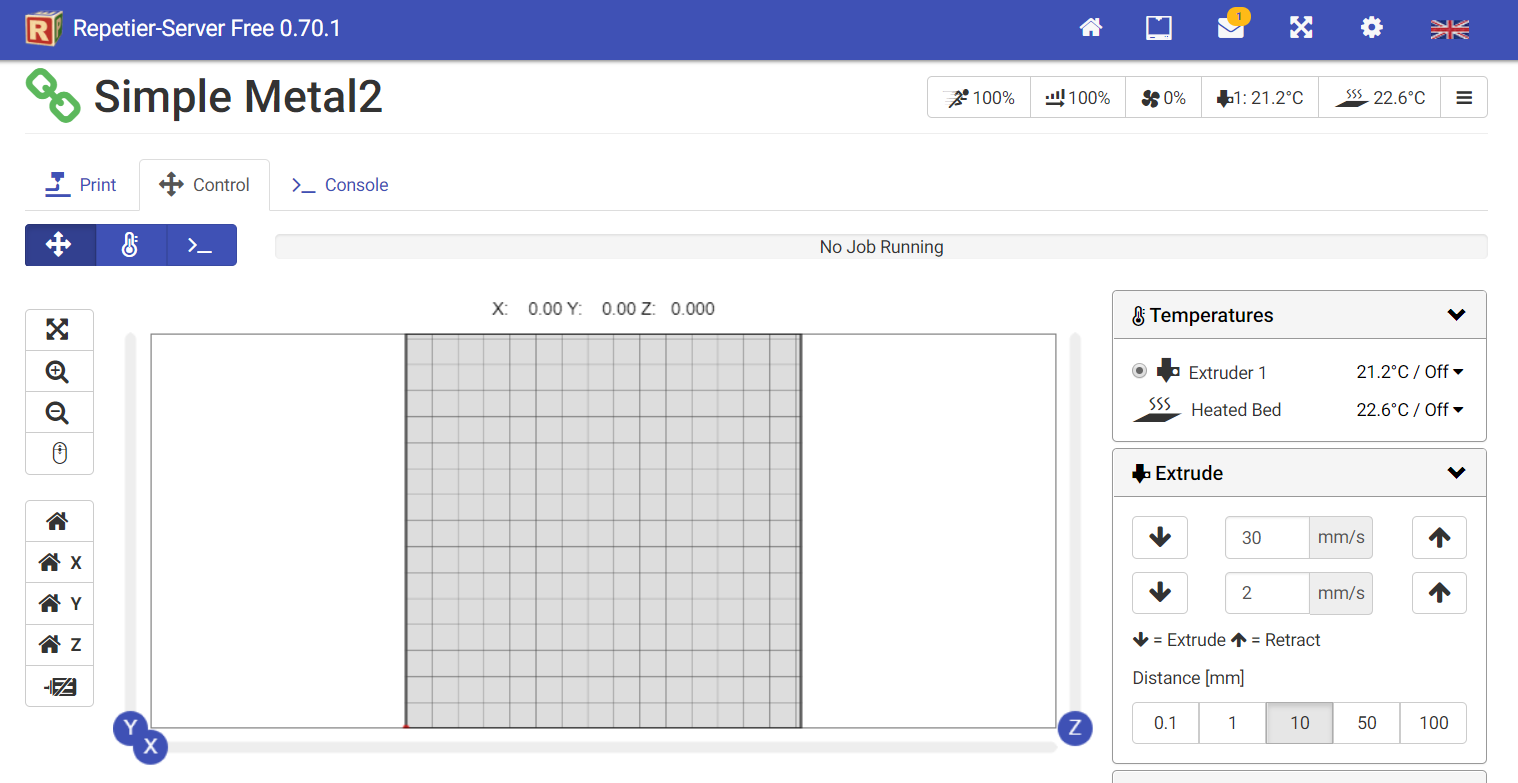
- Monitoring your printer.
- First of all, you can click on the control button on the printer page.
- You'll see the data about the printer. The important parts are the extruder temp and the bed temp on the far right top.
- When you start to print, those will start to rise.
Related articles
Content by label
There is no content with the specified labels
1 Comment
Mark R Millsap
There is currently NO SIGN on the wall with username and password to enable login to the print server. Very frustrating to try and follow instructions and not be able to. Can we please just post the user name and password here?